How to Fix Blurry AI-Generated Images Automatically: 7 Proven Methods + Step-by-Step Guide
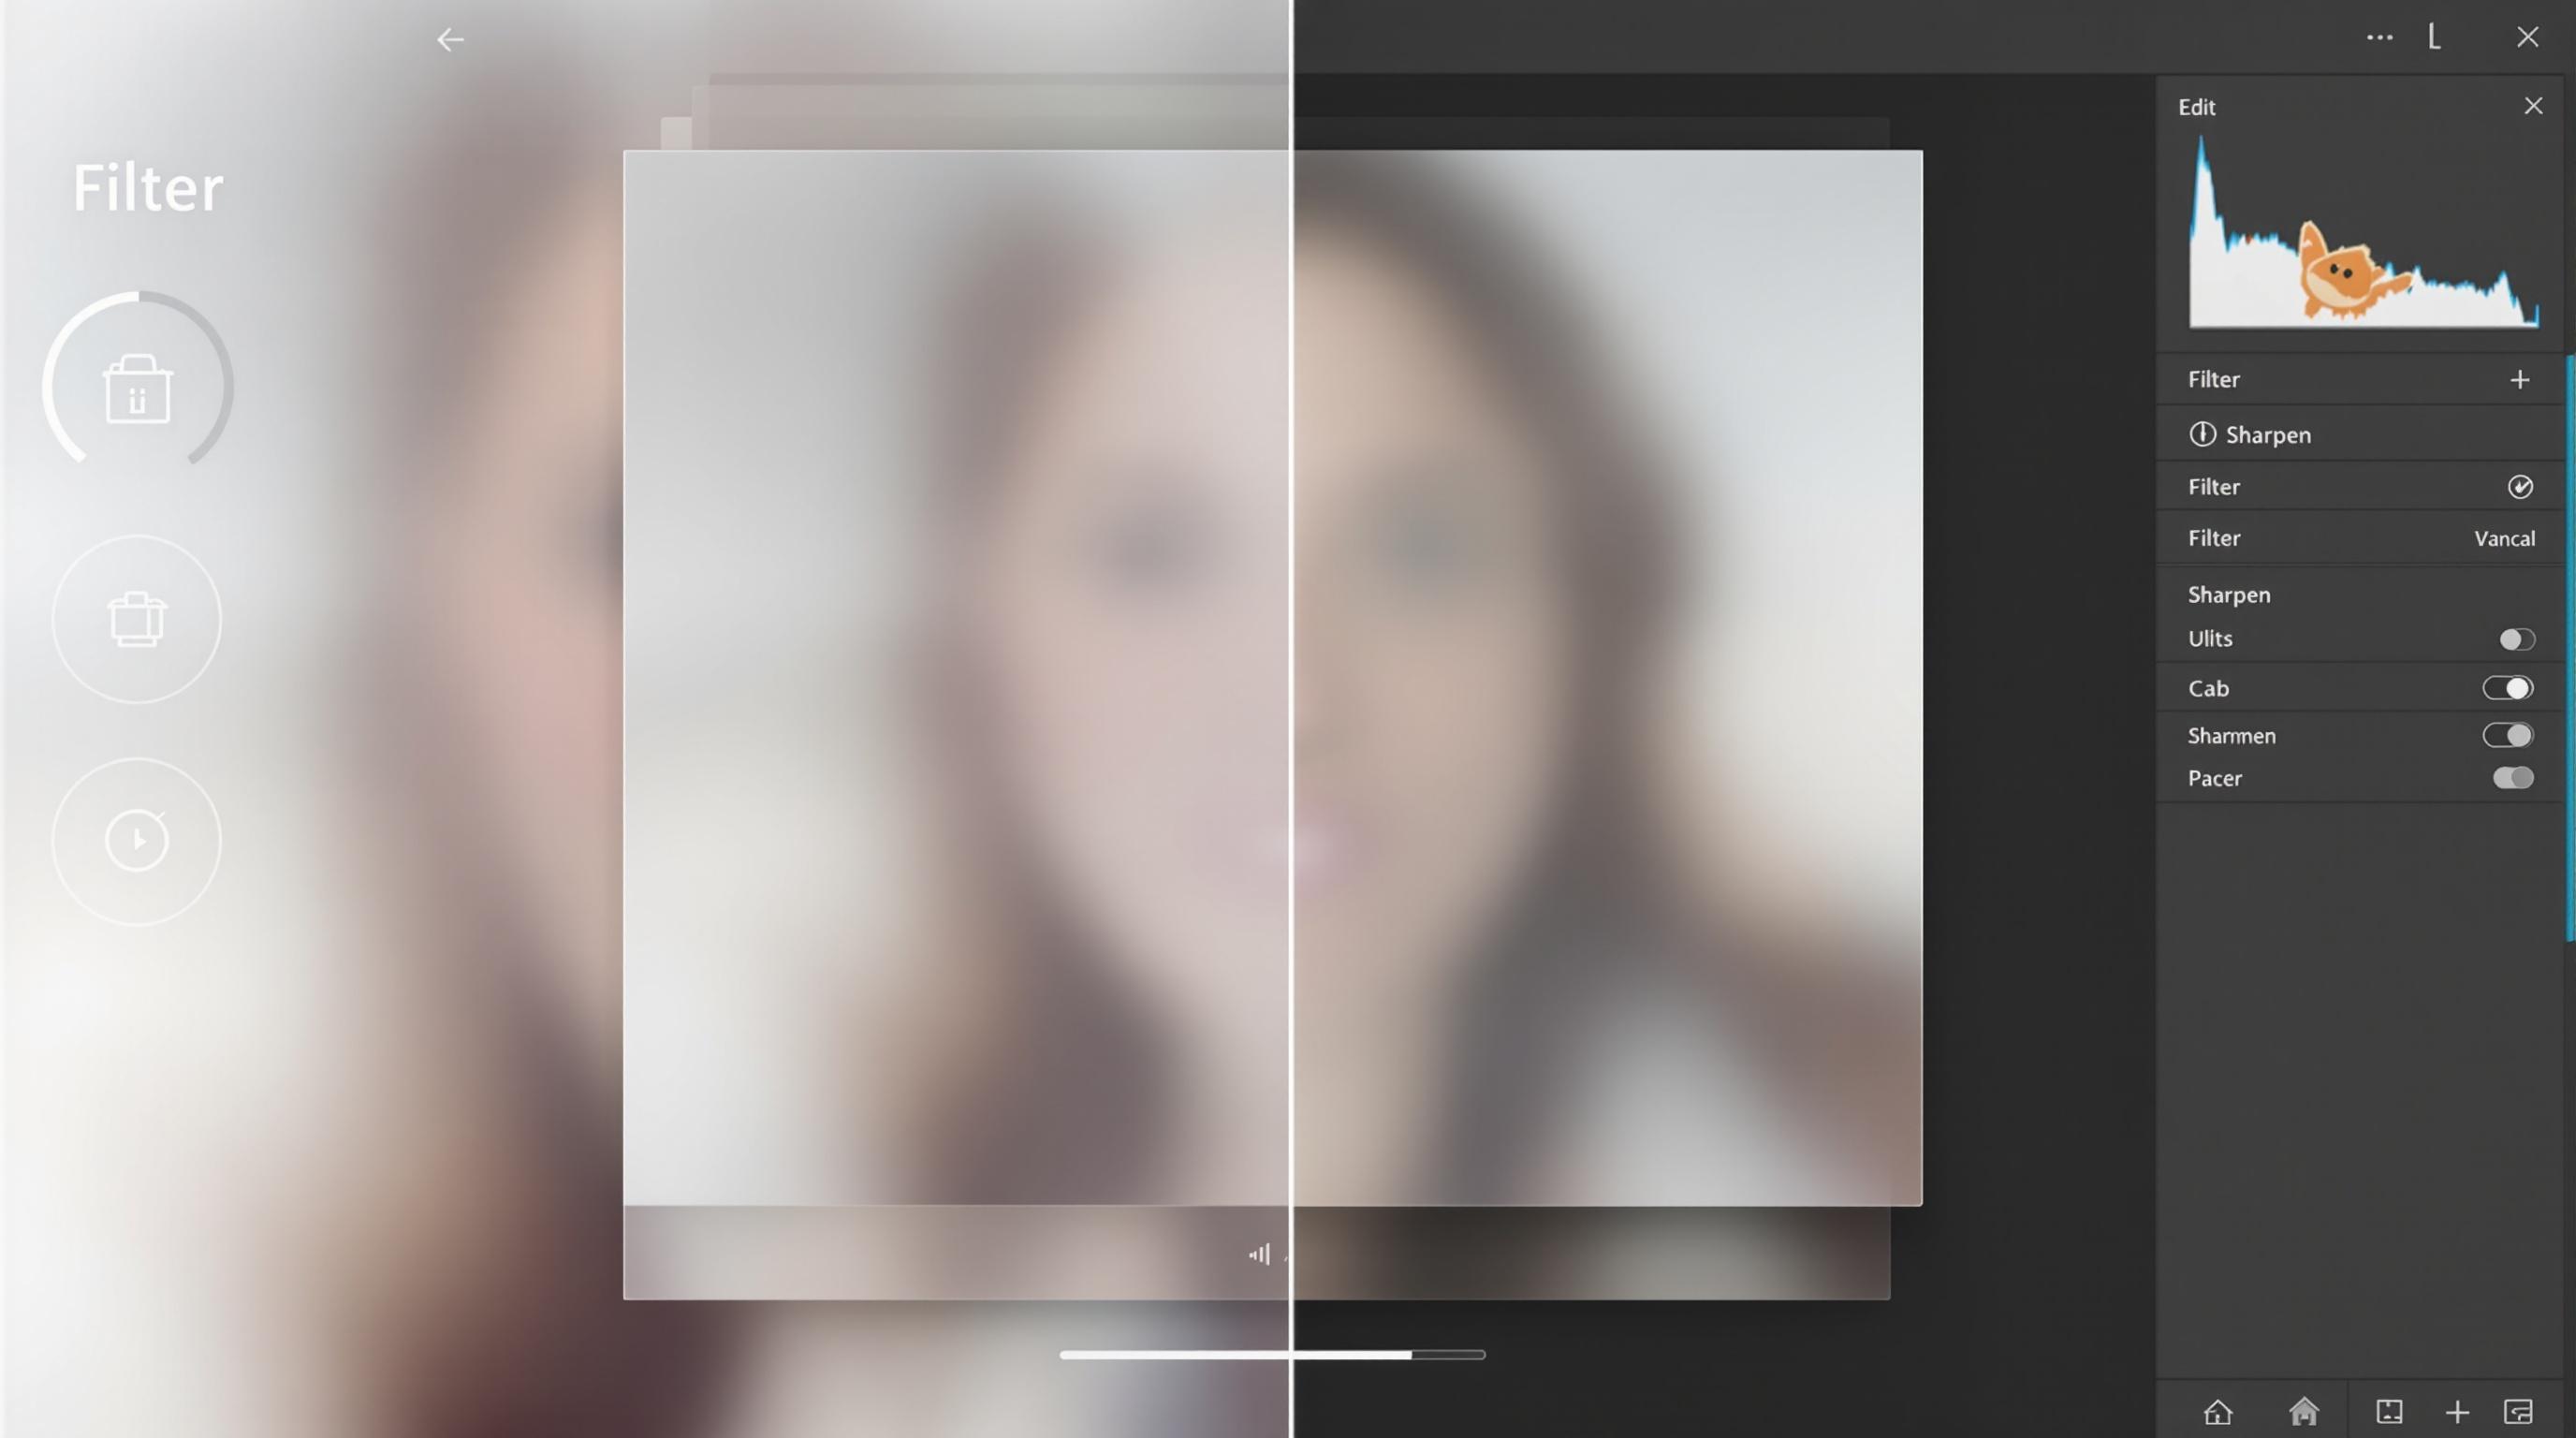
Tired of blurry AI-generated images ruining your creative vision? This guide provides 7 automatic fixes to sharpen and enhance your visuals, ensuring crystal-clear results without needing advanced editing skills. Discover user-friendly tools like CutoutPro and techniques to dramatically improve your AI art, so you can say goodbye to blurry disappointments and hello to stunning, high-quality images.
Introduction: Stop Suffering from Blurry AI Images!
Ever felt the frustration of finally generating that perfect AI image, only to find it looks like a watercolor painting done in a snowstorm after you export it? You're not alone. Many users grapple with the issue of blurry AI-generated images, a problem that can diminish the impact of otherwise stunning creations.
Why Are My AI Images Blurry?
Several factors can contribute to the blurriness you're experiencing. It often boils down to a combination of technical limitations and processing quirks inherent in AI image generation. Here are some of the most common culprits:
Low Resolution: AI image generators sometimes default to relatively low output resolutions. While they might look acceptable on a phone screen, blowing them up for larger displays or print can reveal pixelation and blur.
Compression Artifacts: Image compression, especially when saving as a JPEG, can introduce noticeable artifacts. This is like squashing a digital file to make it smaller, often at the expense of fine details. The more you compress, the blurrier the image becomes.
Focus Issues: Similar to a camera lens struggling to find its focal point, AI algorithms can sometimes produce images with areas that appear slightly out of focus, leading to a general lack of sharpness. The models might struggle with generating photorealistic images, or the specific prompt might confuse the generator.
7 Automatic Fixes to the Rescue!
But don't despair! The good news is that you don't have to be a Photoshop wizard to tackle blurry AI images. There are numerous automatic solutions designed to sharpen, upscale, and enhance your visuals with just a few clicks. This guide will walk you through 7 proven methods to rescue your blurry masterpieces and bring them into crystal-clear focus. We'll explore user-friendly tools and techniques that can dramatically improve the quality of your AI art generators, so that you won't have to spend hours manually editing each image. For example, you could use a tool like CutoutPro which offers an AI photo enhancer tool.
Get ready to say goodbye to blurry disappointments and hello to sharp, stunning AI-generated images that truly shine!
Understanding Why AI Images Become Blurry: The Technical Reasons
Ever wondered why that seemingly perfect AI-generated image looks a bit…fuzzy? Let's dive into the technical reasons behind blurry AI images and explore why they sometimes fall short of crystal clarity.
The 512x512 Starting Point
Many AI image generators, particularly those built on Stable Diffusion, often default to a resolution of 512x512 pixels. Think of it as the canvas size. While this resolution is sufficient for generating a wide variety of images, it's relatively small compared to the high-resolution images we're accustomed to seeing on modern displays and in print. Imagine trying to paint a detailed landscape on a tiny postage stamp – you're inevitably going to lose some detail. When you upscale these smaller images to larger sizes, the lack of initial detail can result in a blurry or pixelated appearance. To combat this, consider using tools with higher default resolutions or experimenting with upscaling techniques after the initial generation. Some tools, like Leonardo AI, offer options for higher resolution outputs from the start.
Compression: The Detail Thief
Once your AI image is generated, it often undergoes compression during the export or download process. Compression algorithms reduce file size by discarding some image data, and while this is great for storage and sharing, it can also introduce blurriness. Think of it like photocopying a photocopy – each time, the image degrades slightly. Common image formats like JPEG use lossy compression, meaning some image quality is sacrificed to achieve smaller file sizes. To minimize blurriness from compression, consider exporting your images in lossless formats like PNG or TIFF, especially if you plan to further edit or upscale them.
VAE Artifacts: The Decoder's Dilemma
Variational Autoencoders (VAEs) are a crucial part of many AI image generation pipelines. They act as a decoder, translating the AI's latent representation of an image into a visual output. However, this decoding process isn't always perfect. VAE artifacts can appear as subtle blurring, color distortions, or grid-like patterns in the image. It's like trying to translate a complex poem – some nuances are inevitably lost in translation. While some models have better VAEs than others, these artifacts can be a common source of blurriness, particularly in images with fine details or subtle gradients.
Motion Blur: Capturing Movement (Or Not)
If your AI-generated scene involves movement, you might encounter motion blur. While intentional motion blur can add a sense of dynamism, unwanted or excessive motion blur can simply make the image look out of focus. Imagine trying to photograph a race car with a slow shutter speed – the car will appear as a streak of blur. AI models sometimes struggle to accurately simulate motion, resulting in unrealistic or distracting blur. Experimenting with different prompts or using models specifically trained to handle motion can help mitigate this issue. For example, a tool like Runway, which focuses on video generation, may handle motion more effectively.
The Limits of Traditional Sharpening
You might think, "Why not just sharpen the image?" Unfortunately, traditional sharpening methods often fall short when dealing with AI-generated blurriness. These methods typically work by increasing the contrast along edges, which can exacerbate existing artifacts and create a harsh, unnatural look. It's like trying to fix a broken vase with superglue – it might hold it together, but the cracks are still visible. Instead, you often need more sophisticated techniques that address the underlying causes of the blur, such as AI-powered upscaling or specialized deblurring algorithms. Think of it like this: sharpening is like putting glasses on, while AI upscaling is like getting LASIK—one enhances what's already there, while the other corrects the underlying problem.
Understanding these technical reasons is the first step in combating blurry AI images. By recognizing the common causes of blurriness, you can make informed decisions about your workflow and choose the right tools and techniques to achieve sharper, more visually appealing results. Now that we know why images become blurry, let's explore how to fix them.

Method 1: Free Online AI Sharpening Tools
Ever felt the frustration of an otherwise perfect AI-generated image being ruined by blurriness? Fear not! Let's dive into some fantastic solutions, starting with a method that's both free and easily accessible: leveraging online AI sharpening tools.
One-Click Wonder: Pixlr AI Super Sharp
Imagine sharpening your image with a single click. That's the promise of Pixlr AI Super Sharp. This tool stands out for its simplicity and speed. There's no need for complex settings or technical know-how. Just upload your blurry image, click the "Sharpen" button, and let Pixlr's AI algorithms do their magic. Plus, there's no registration required, making it incredibly convenient for quick fixes.
Pixelcut Unblur Tool: Free, Fast, and Fabulous
Next up is the Pixelcut Unblur Tool, a gem for those seeking a completely free solution. What sets Pixelcut apart? First, it's entirely free to use. Second, the sharpened images are watermark-free, a significant advantage. Third, it supports bulk processing, allowing you to sharpen multiple images simultaneously. This is a huge time-saver if you have a batch of AI-generated images needing improvement. Pixelcut offers a user-friendly interface, making it accessible to everyone, regardless of their technical skills. If you are working with ecommerce images, this tool is especially helpful. For example, you could generate many product variations with Leonardo AI and quickly fix any blurry results in bulk with Pixelcut.
Upscale and Enhance: ImgUpscaler.ai
If you need more than just sharpening, ImgUpscaler.ai is worth checking out. This tool combines sharpening with 4K upscaling, meaning you can increase the resolution of your image while simultaneously enhancing its clarity. ImgUpscaler.ai boasts a remarkably fast processing time, often completing the task in just around 10 seconds. This efficiency makes it a great option when you want high-quality results without long waiting times.
Step-by-Step Guide to Using Online AI Sharpening Tools
Let's walk through the general steps to use these online AI sharpening tools. For this example, we'll use ImgUpscaler.ai, but the process is similar for the other tools mentioned above.
Find the AI Sharpening Tool: Navigate to ImgUpscaler.ai.
Upload Your Image: Click on the "Upload" button or drag and drop your blurry AI-generated image onto the designated area.
Let AI Work its Magic: With ImgUpscaler.ai, the process is automatic. Once the image is uploaded, the AI immediately starts processing it.
Download the Sharpened Image: After a few seconds, the sharpened and upscaled image will be ready. Click the "Download" button to save the enhanced version to your device.
Online AI sharpening tools provide a quick, accessible, and often free way to fix blurry AI-generated images. They're perfect for on-the-fly enhancements and batch processing, making them a valuable asset in your AI toolkit.
Now that we've explored the convenience of online tools, let's move on to another powerful method: using dedicated AI photo editors.
Method 2: Professional AI Upscaling Software
Ever wished you could wave a magic wand and instantly clear up those fuzzy AI-generated images? Thankfully, professional AI upscaling software might just be the closest thing to it.
Unleashing the Power of Dedicated AI Sharpeners
Unlike general-purpose photo editors, these tools are built specifically to tackle image quality issues with advanced AI algorithms. They analyze the image, identify blur patterns, and then reconstruct the details with remarkable precision. This approach not only sharpens the image but also enhances its overall resolution, making it look crisp and clear. Batch processing capabilities are very useful for enhancing large numbers of images quickly.
Let's explore some of the top contenders in this arena:
Topaz Sharpen AI: Think of this as your all-in-one sharpening solution. Topaz Sharpen AI offers specialized modes to address various types of blur. At $79.99, it gives you:
Standard: A general sharpening mode for slightly soft images.
Motion Blur: Perfect for rescuing images with movement-induced blur.
Lens Blur: Corrects blur caused by camera lens imperfections.
VanceAI Image Sharpener: This tool provides a user-friendly experience with a range of sharpening options. VanceAI offers five distinct sharpening modes to cater to different needs, from subtle enhancements to aggressive detail recovery.
Real-ESRGAN: For the tech-savvy users, Real-ESRGAN stands out as a powerful, open-source option. This software uses a command-line interface, granting you greater control over the upscaling process. The command line interface does make it more challenging to learn and use for novice users.
These tools leverage sophisticated machine learning models trained on vast datasets of images, enabling them to intelligently sharpen images without introducing unwanted artifacts or distortions.
These professional tools can often work in batch processing which allows you to sharpen many images at once. Instead of painstakingly processing images one-by-one, batch processing lets you apply the same settings to an entire folder of images, saving you considerable time and effort. This feature is indispensable for projects involving numerous AI-generated visuals.
By leveraging professional AI upscaling software, you can transform your blurry AI creations into visually stunning masterpieces. The next method will discuss using online tools to perform this same task.
Method 3: Stable Diffusion Built-in Solutions
Ever felt the frustration of creating an amazing image with AI, only to have it marred by blurriness? Thankfully, Stable Diffusion Online offers several built-in solutions to tackle this problem head-on.
Hi-Res Fix: A Simple Toggle for Sharper Images
One of the easiest and most effective ways to enhance the resolution of your AI-generated images in Stable Diffusion is by enabling the "Hi-Res fix" option before you start the generation process. Think of it as telling Stable Diffusion, "Hey, I want this one to be extra crisp!" What this does under the hood is initially generate the image at a lower resolution, which is faster and requires less memory. Then, it intelligently upscales the image while adding finer details based on your prompt. This process significantly reduces the chances of ending up with a blurry or pixelated final product. It's like sketching a rough draft before adding the intricate details in the final painting. Remember to experiment with different upscaling algorithms offered within the Hi-Res fix settings to find the one that works best for your specific image and desired aesthetic.
VAE Improvements: Fine-Tuning Color and Detail
Variational Autoencoders (VAEs) are crucial for decoding the latent space in Stable Diffusion into the final image you see. Sometimes, the default VAE can lead to washed-out colors or a lack of fine detail. Using updated VAE files can drastically improve the visual fidelity of your generated images. Consider it like upgrading the lens on your camera – a better lens captures more light and detail, resulting in a sharper, more vibrant picture. You can download updated VAE files from resources like Civitai (a community hub for AI art resources) and easily integrate them into your Stable Diffusion setup. By switching to a more refined VAE, you're essentially sharpening the tool that translates the AI's vision into a visible image.
The 'Extras' Tab: Built-In Upscaling with ESRGAN
Even after generating an image, it's not too late to improve its sharpness. The "Extras" tab in Stable Diffusion provides a convenient way to upscale existing images, including those generated by AI. One of the most popular upscaling algorithms available here is ESRGAN (Enhanced Super-Resolution Generative Adversarial Network). ESRGAN models are trained to intelligently add details while upscaling, making your images not just bigger, but also sharper and more realistic. It’s akin to taking a blurry photograph to a professional photo restorer who can fill in the missing details and make it look brand new. Simply upload your image to the "Extras" tab, select your desired ESRGAN model, and set the upscaling factor to breathe new life into your blurry creations. Experiment with different ESRGAN models to find the one that best suits your style and the type of image you're upscaling.
Automatic Face Restoration: Saving Garbled Faces
One of the trickiest aspects of AI image generation is getting faces right. Often, AI models struggle with the intricate details of human faces, resulting in garbled or distorted features. Fortunately, Stable Diffusion offers automatic face restoration options designed specifically to address this issue. This feature automatically detects faces within an image and applies specialized algorithms to correct imperfections and enhance details. Think of it as having a dedicated facial reconstruction expert on your team! By enabling this setting, you can rescue portraits and images with prominent faces from the dreaded blurry fate, ensuring that your subjects look their best. This setting is often found within the main settings or as a checkbox during the image generation process. Be sure to experiment with different face restoration models to see which yields the most natural and pleasing results.
By leveraging these built-in features within Stable Diffusion, you can dramatically improve the sharpness and clarity of your AI-generated images, transforming blurry disappointments into stunning works of art. Combining these methods offers a multi-layered approach to ensure you get the crispest possible result. Next, we will explore online AI photo enhancers.
Method 4: ESRGAN Model Integration
Ever wish you could breathe new life into those slightly fuzzy AI creations? Method 4 dives into the world of ESRGAN, a powerful technique for upscaling and enhancing your AI-generated images.
Unveiling ESRGAN: The Detail Restorer
ESRGAN, short for Enhanced Super-Resolution Generative Adversarial Network, is a sophisticated AI model designed to upscale images while adding realistic details. Think of it as a highly skilled digital artist that not only increases the resolution but also intelligently reconstructs textures and fine lines, turning blurry or low-resolution images into crisp, high-quality visuals. Unlike traditional upscaling methods that often result in pixelation or artificial-looking smoothness, ESRGAN uses a deep neural network trained on vast datasets to learn realistic textures and patterns. This allows it to "hallucinate" details that were not originally present in the image, making the upscaled result significantly more appealing. It essentially fills in the blanks, guided by its learned understanding of what real-world textures look like. If you're familiar with AI image generation, ESRGAN can be compared to the refinement process a tool like Adobe Firefly applies to improve image quality, but as a standalone upscaling solution.
Installing ESRGAN in Stable Diffusion WebUI
Integrating ESRGAN into your Stable Diffusion workflow is surprisingly straightforward, especially if you're using the popular Stable Diffusion WebUI. Here's a step-by-step guide:
Download ESRGAN Models: The first step is to acquire the ESRGAN models themselves. These models are typically available as
.pthfiles. A great place to find a variety of ESRGAN models is Civitai, a community hub for AI art resources. Look for models specifically designed for upscaling and detail restoration.Locate the ESRGAN Directory: Within your Stable Diffusion WebUI installation directory, navigate to the
modelsfolder, and then find (or create, if it doesn't exist) anESRGANsubfolder. This is where you'll store your downloaded models.Place the Models: Simply copy the downloaded
.pthfiles into theESRGANdirectory. That's it for the installation!Restart or Refresh: Restart your Stable Diffusion WebUI or, alternatively, use the "Refresh model list" button (usually found in the settings) to ensure the WebUI recognizes the newly added models.
Once installed, you'll typically find ESRGAN models as available options in the upscaling or post-processing sections of your image generation workflow.
Choosing the Right Model: A Tailored Approach
Not all ESRGAN models are created equal. Different models are trained on different datasets and are optimized for specific types of images. Using the wrong model can sometimes lead to undesirable results, such as over-sharpening or the introduction of artifacts. Here's a general guideline:
Real-World Photos: For upscaling real-world photographs, models trained on general image datasets (often labeled as "general-purpose" or "photo-realistic") tend to work best.
Anime/Illustrations: If you're working with AI-generated anime or illustrations, look for models specifically trained on anime-style artwork. These models are better at preserving the clean lines and vibrant colors characteristic of this style. Leonardo AI is also another tool to consider if you want to generate high quality game assets.
Specific Textures: Some ESRGAN models are designed to enhance specific textures, such as skin, fabric, or foliage. If your image contains a prominent texture, consider using a specialized model to bring out the details.
Experimentation is key! Don't be afraid to try out different models and see which one produces the best results for your particular image.
Batch Processing with ESRGAN: Scaling Up Your Workflow
For those working with a large number of images, batch processing can save a significant amount of time and effort. Fortunately, Stable Diffusion WebUI offers built-in support for batch processing ESRGAN models. The typical workflow looks like this:
Prepare Your Images: Place all the images you want to upscale into a single directory.
Configure Batch Processing: In the Stable Diffusion WebUI, navigate to the batch processing tab (often found within the "Extras" or "Post-processing" section).
Specify Input and Output Directories: Set the input directory to the directory containing your images and choose an output directory to store the upscaled results.
Select ESRGAN Model and Settings: Choose the appropriate ESRGAN model from the dropdown menu and adjust any relevant settings, such as the upscaling factor (e.g., 2x, 4x).
Run the Batch: Start the batch processing. The WebUI will automatically process each image in the input directory using the selected ESRGAN model and save the upscaled versions to the output directory.
Batch processing can be resource-intensive, especially with high upscaling factors. Monitor your system's CPU and GPU usage to ensure optimal performance.
By harnessing the power of ESRGAN within Stable Diffusion WebUI, you can effectively enhance and upscale your AI-generated images, bringing out finer details and achieving a professional-looking finish. Next, we'll explore the benefits of using online AI image upscalers.
Method 5: Photoshop Quick Fix
Sometimes, the quickest route is the best one. If you already have Adobe Photoshop AI installed, a few clicks might be all you need to rescue your blurry AI-generated image. Photoshop, a powerful image editing software enhanced with AI capabilities, offers several built-in sharpening tools that can work wonders.
Filter > Sharpen > Unsharp Mask
This classic technique has been a Photoshop staple for years. It might sound counterintuitive, but the Unsharp Mask filter actually sharpens images. Here's how to use it:
Open your AI-generated image in Photoshop.
Go to Filter > Sharpen > Unsharp Mask.
A dialog box will appear with three sliders: Amount, Radius, and Threshold.
Amount: Controls the intensity of the sharpening. Start with a low value (e.g., 50%) and increase gradually.
Radius: Determines the width of the sharpening effect around edges. A smaller radius (e.g., 1 pixel) is usually better for fine details, while a larger radius can be used for broader sharpening.
Threshold: Controls the minimum contrast difference that will be sharpened. A higher threshold prevents sharpening of areas with subtle differences, reducing noise.
Experiment with these settings until you achieve the desired level of sharpness. Pay close attention to the preview window.
Click OK to apply the filter.
The key with the Unsharp Mask is to avoid over-sharpening, which can lead to unwanted artifacts and halos around edges. Subtle adjustments are often more effective.
Smart Sharpen with Automatic Settings
For a more automated approach, Photoshop's Smart Sharpen filter can analyze your image and apply sharpening based on its content. Here’s how to use it:
Open your image in Photoshop.
Go to Filter > Sharpen > Smart Sharpen.
In the Smart Sharpen dialog box, you can choose to adjust settings manually. However, for a quick fix, try the **
Method 6: Mobile Apps for On-the-Go Enhancement
Sometimes, the best solution is right in your pocket. Mobile apps offer a convenient way to enhance AI-generated images while you're on the move, providing quick fixes and impressive results directly from your smartphone. Let's explore some top contenders.
Pixelcut: Your All-in-One Mobile Editor
Pixelcut is a fantastic mobile app available for both iOS and Android that's like having a mini-Photoshop in your pocket. It's incredibly versatile, offering a range of tools perfect for quickly fixing blurry AI-generated images:
Sharpening: Easily increase the sharpness of your image to bring out details that were previously lost in the blur.
Detail Enhancement: Pixelcut lets you selectively enhance specific areas, ensuring a natural look without over-sharpening the entire image.
Noise Reduction: Reduce unwanted graininess that can sometimes accompany AI-generated images, creating a cleaner final product.
User-Friendly Interface: Pixelcut is designed with mobile users in mind, so you won't need to be a professional photo editor to get impressive results.
Whether you want to quickly sharpen an image for social media or perform more in-depth editing, Pixelcut offers a wide array of editing tools.
ReminiAI: The Face Enhancement Expert
If your AI-generated images feature faces that are looking a bit soft, Remini is your go-to app. Specializing in facial enhancement, ReminiAI uses powerful AI algorithms to:
Restore Detail: Bring back lost detail in facial features, making them sharper and more defined. Imagine turning a blurry, pixelated face into a clear, recognizable one with just a few taps.
Reduce Noise: Smooth out skin tones and remove unwanted noise, resulting in a more polished and professional look.
Enhance Skin Texture: Improve skin texture, making it look more natural and lifelike. No more plastic-looking AI faces!
Easy to Use: The simple interface makes it easy for anyone to enhance their photos, regardless of technical skills.
Remini is perfect for breathing life into AI-generated portraits and ensuring that every face looks its best.
Waifu2x: Sharpening Anime-Style Images
For those creating anime-style images with AI, Waifu2x is a must-have. This tool is specifically designed to upscale and sharpen anime-style artwork, and it’s available as a mobile app for on-the-go convenience. Waifu2x excels at:
Upscaling Without Loss of Quality: Increase the resolution of your anime images without introducing unwanted artifacts or blurring. It preserves the crisp lines and vibrant colors that define the style.
Noise Reduction: Effectively reduces noise and graininess, resulting in a cleaner, more polished final image. This is particularly useful for images generated by AI, which can sometimes have artifacts.
Anime-Optimized Algorithms: Waifu2x uses algorithms that are specifically trained on anime artwork, ensuring optimal results. It understands the unique characteristics of the style and enhances them accordingly.
Simple Interface: The app is incredibly easy to use, with a straightforward interface that makes upscaling and sharpening a breeze.
Mobile apps offer a fantastic solution for quickly and easily enhancing AI-generated images. From general-purpose editors like Pixelcut to specialized tools like ReminiAI and Waifu2x, there's an app out there to meet your needs. These mobile solutions are a convenient way to refine your creations and share them with the world, directly from your smartphone.
Choosing the right tool depends on the type of image and the specific issues you need to address.
Method 7: Prevention Tips: Generating Better Images from the Start
Even with the best upscaling and enhancement techniques, the most effective way to tackle blurry AI-generated images is to prevent blurriness in the first place. By optimizing your initial image creation process, you can significantly reduce the need for post-processing and achieve sharper, more detailed results from the outset. Let's explore some key prevention tips.
Optimal Resolution Settings for Different AI Tools
One of the most straightforward ways to improve image quality is to use the right resolution settings within your AI art generators. However, the ideal settings can vary depending on the specific tool you're using.
Midjourney: This tool excels at creating high-resolution images with impressive detail. Experiment with the
--arparameter to define the aspect ratio and--wand--hparameters to control width and height. Using values like--w 1024 --h 1024or higher can produce excellent results, especially for detailed scenes. Midjourney is a powerful AI image generator known for its artistic and photorealistic capabilities.DALL-E 3: Integrated within ChatGPT, DALL-E 3 automatically optimizes image resolution based on your prompt. While you don't have direct control over pixel dimensions, providing detailed prompts and iterating on the results can lead to sharper outputs. ChatGPT is a versatile AI chatbot capable of generating text, translating languages, and creating images using DALL-E 3. If you are using the DALL-E API, experiment with higher resolution settings if available.
Stable Diffusion: Offers a wide range of customization options, including resolution. In most UIs, you can directly set the width and height of the generated image. Start with a resolution of 512x512 pixels and increase it gradually, keeping in mind that higher resolutions require more processing power and time. For example, you could try 768x768 or 1024x1024. Be aware of VRAM limitations.
Leonardo AI: This platform provides various models and settings, including resolution controls. Explore different models to see which ones produce the sharpest images for your specific needs. Like Stable Diffusion, experimenting with different resolutions is crucial to finding the sweet spot between detail and performance. Leonardo AI is an AI image generation platform offering various models and creative tools.
Remember to consider the trade-off between resolution and processing time. Higher resolutions will generally produce sharper images but may take longer to generate and require more computational resources. Experiment to find the optimal balance for your specific hardware and desired output quality.
Prompt Engineering for Sharper Results
The quality of your prompts plays a crucial role in the sharpness and clarity of AI-generated images. Effective Prompt Engineering involves crafting detailed, specific prompts that guide the AI model to produce the desired results.
Be Specific: Instead of generic descriptions, use precise language to define the subject, style, and composition of your image. For example, instead of "a landscape," try "a photorealistic landscape of the Swiss Alps at sunrise, with snow-capped peaks and a clear blue lake in the foreground."
Use Descriptive Adjectives: Incorporate adjectives that describe the desired level of detail and sharpness. Terms like "high-resolution," "ultra-detailed," "sharp focus," and "crisp lines" can help guide the AI model.
Specify the Style: If you're aiming for a particular artistic style, be sure to include it in your prompt. For example, "a hyperrealistic portrait" or "an impressionistic painting with vibrant colors."
Iterate and Refine: Don't be afraid to experiment with different prompts and iterate on your results. Analyze the generated images and adjust your prompts accordingly to fine-tune the output. Sometimes, subtle changes in wording can make a significant difference.
Use Negative Prompts: Many AI image generators allow you to specify elements you don't want in the image. This can be helpful for preventing unwanted blur or artifacts. For instance, you might include "--no blur" or "--no artifacts" in your prompt.
Export Best Practices to Avoid Blur
Even if you generate a sharp image, improper export settings can introduce blur or reduce the overall quality. Here are some best practices to follow:
Choose the Right Format: Opt for lossless formats like PNG or TIFF to preserve the maximum amount of detail. JPEG is a lossy format that can introduce compression artifacts and blurriness, especially at lower quality settings. Only use JPEG if file size is a critical concern, and always use the highest quality setting.
Avoid Resizing During Export: If possible, avoid resizing the image during the export process. Resizing can introduce interpolation artifacts and reduce sharpness. If resizing is necessary, use a high-quality resampling algorithm like Lanczos or Bicubic.
Use Appropriate DPI: Ensure that the DPI (dots per inch) setting is appropriate for your intended use. For print, a DPI of 300 or higher is generally recommended. For web use, a DPI of 72 is usually sufficient.
Disable Unnecessary Filters: Some image editing software may apply default filters or sharpening effects during export. Disable these filters to avoid unwanted modifications to your image.
By implementing these prevention tips, you can significantly reduce the occurrence of blurry AI-generated images and achieve consistently sharper, more detailed results. This proactive approach saves time and effort in post-processing and ensures that your initial creations are of the highest possible quality. Now that we've covered various methods to prevent and fix blurry images, let's briefly recap the key takeaways.
Comparison Table: AI Sharpening Tool Performance
Ever felt the disappointment of generating a stunning AI image, only to find it's marred by blurriness? Don't worry, you're not alone. Let's dive into how different AI sharpening tools stack up against each other. We'll explore their speed, quality, cost, and ideal use cases, helping you pick the perfect solution for your needs. Remember, a clear image can make all the difference, whether it's for personal enjoyment or professional projects. If you're interested in creating images in the first place, you could use a tool like Midjourney, a powerful AI image generator known for its artistic and photorealistic results, to create stunning visuals. Let’s get started!
Decoding the Metrics
Before we jump into the comparison table, let's quickly define what we mean by each category:
Speed: How quickly the tool processes and sharpens an image. This can range from near real-time to several minutes, depending on the complexity and processing power required.
Quality: The level of detail and clarity achieved after sharpening. Does the tool simply increase contrast, or does it intelligently restore lost details without introducing artifacts?
Cost: The pricing structure of the tool. Some tools are free, while others offer subscription plans or one-time purchases.
Best For: The ideal user or use case for the tool, considering its strengths and weaknesses.
Comparison Table: AI Sharpening Tool Performance
Tool | Speed | Quality | Cost | Best For |
|---|---|---|---|---|
Pixlr Super Sharp | Very Fast | Good for quick touch-ups, but limited detail recovery. | Free/Premium Options | Social media enthusiasts, quick fixes, users needing basic sharpening without advanced features. |
Topaz Sharpen AI | Moderate | Excellent detail recovery and artifact reduction. | Paid License | Professional photographers, graphic designers, users requiring high-quality results for print or detailed digital work. |
Real-ESRGAN | Slow to Mod. | Very High-Quality Upscaling & Sharpening. | Open Source | Tech-savvy users, researchers, individuals comfortable with command-line interfaces or looking for cutting-edge, customizable solutions. |
Pixlr Super Sharp: The Speedy Fix
Pixlr Super Sharp shines when you need a quick and easy fix. Imagine you're about to post a photo on Instagram, and it looks just a tad soft. Pixlr can quickly boost the sharpness, making it presentable without requiring much effort or technical know-how. It's like the fast-food of image sharpening – convenient and gets the job done for everyday needs. The best part? It offers a free version, with premium options for those needing more features. For those seeking quick, on-the-fly enhancements, Pixlr is your go-to.
Topaz Sharpen AI: Professional Precision
For those who demand the highest level of quality, Topaz Sharpen AI stands out. This tool uses sophisticated AI algorithms to intelligently restore lost details, reduce artifacts, and create images that look crisp and professional. Think of it as a skilled artisan meticulously restoring a valuable painting. While it comes with a price tag, the investment is worthwhile for professional photographers, graphic designers, and anyone needing top-tier results. Topaz Sharpen AI excels in scenarios where quality is paramount, making it an indispensable tool for serious image editing.
Real-ESRGAN: The Tech Enthusiast's Choice
Real-ESRGAN is like the open-source Swiss Army knife of AI image enhancement. Designed for tech-savvy users, it offers powerful upscaling and sharpening capabilities, particularly effective at restoring details in faces and other intricate elements. Because it's open-source, you'll likely need some technical skills to set it up and run it, but the potential is immense. You have full control over the parameters, allowing you to customize the sharpening process to your exact specifications. For those who enjoy tinkering and pushing the boundaries of AI image enhancement, Real-ESRGAN is an excellent choice. You can stay up-to-date on image-related innovations in AI News.
Choosing the right AI sharpening tool depends on your specific needs and technical expertise. Whether you need a quick fix for social media, professional-grade results, or a customizable open-source solution, there's an AI tool out there to help you achieve your desired level of clarity. Now that you know the options, let's get into the step-by-step guide.
Step-by-Step Tutorial: A Complete AI Image Sharpening Workflow
Ready to rescue your blurry AI-generated masterpieces? This step-by-step tutorial will guide you through a complete AI image sharpening workflow, ensuring crisp, clear results. Let's dive in!
Step 1: Diagnose the Blur—Know Your Enemy
Before you start throwing AI tools at the problem, take a moment to understand the type of blur plaguing your image. This will significantly influence the tool and settings you choose.
Motion Blur: This appears as streaks or lines, often caused by movement during image generation (or in real-world photography that AI tries to mimic). Think of it like a car speeding by, leaving a blurry trail.
Focus Blur: This is a general lack of sharpness across the entire image, as if the lens was slightly out of focus. It’s a softer, more diffuse type of blur.
Compression Artifacts: This type of blur isn't technically blur, but rather blocky or pixelated areas resulting from aggressive image compression. While not a true blur, it reduces perceived sharpness. You might see this after downloading an image from a platform that heavily compresses images.
Knowing the enemy is half the battle. Once you identify the blur type, you can select the best tool for the job.
Step 2: Select Your Weapon—Choosing the Right AI Sharpening Tool
With the blur type identified, it’s time to pick the right tool. Several AI-powered options can help sharpen images, each with its own strengths.
For example, you could use CutoutPro, an AI tool that offers a range of features including an image sharpener that can fix blurry photos online. Or, you could use a tool like Remini, which specializes in restoring old or low-quality photos, also works wonders on subtly blurred AI-generated images. For more advanced editing, Adobe Photoshop AI provides robust sharpening filters and AI-powered enhancements.
Consider these factors when choosing:
Type of Blur: Some tools excel at specific blur types (e.g., motion blur reduction).
Ease of Use: Opt for a user-friendly interface, especially if you're a beginner.
Output Quality: Check reviews and examples to ensure the tool produces high-quality results.
Cost: Some tools are free, while others require a subscription or one-time purchase.
Step 3: Upload and Process—Dialing in the Perfect Settings
Now that you’ve chosen your tool, upload your blurry image. This is where the magic happens. Most AI sharpening tools offer adjustable settings; here's how to approach them:
Sharpening Strength: This controls the intensity of the sharpening effect. Start with a low value and gradually increase it until the image looks sharp without introducing artifacts (e.g., excessive grain or halos around edges).
Blur Type (if applicable): Some tools let you specify the type of blur (motion, focus, etc.) for more targeted correction.
Artifact Reduction: Enable this option if you notice any unwanted artifacts after sharpening.
Face Enhancement: If your image contains faces, consider enabling face enhancement for better clarity.
It's crucial to experiment with different settings. Every image is unique, and what works for one might not work for another. Think of it like adjusting the focus on a camera lens – small tweaks can make a big difference.
Step 4: Download and Evaluate—The Moment of Truth
Once you’re satisfied with the preview, download the sharpened image. Now, carefully compare the original and processed versions, paying close attention to:
Overall Sharpness: Is the image noticeably clearer and more detailed?
Artifacts: Are there any unwanted artifacts (grain, halos, pixelation) introduced by the sharpening process?
Naturalness: Does the image still look natural, or does it appear overly processed?
If the sharpened image looks great, congratulations! But if you’re not completely satisfied, don’t despair. You can always go back and adjust the settings or try a different tool. Or, if you have access to more tools, then use comparison to identify other tools that may be of use.
Step 5: (Optional) Fine-Tune with Additional Enhancements
In some cases, the initial sharpening might not be enough. If you still notice subtle blur or want to enhance the image further, consider these additional techniques:
Contrast Adjustment: Increasing contrast can make details stand out more.
Noise Reduction: If the sharpening process introduced noise, apply a subtle noise reduction filter.
Local Adjustments: Use local adjustment tools (available in many photo editors) to selectively sharpen specific areas of the image.
Think of this as the final polish – the extra effort that can elevate your image from good to great.
By following these steps, you'll be well-equipped to tackle blurry AI-generated images and transform them into visually stunning creations. Remember, practice makes perfect, so don't be afraid to experiment and find what works best for your specific needs. To stay up to date with developments in image generation you can also check out the AI News section of our website.
Before/After Gallery: See the AI Sharpening Results
Ever wondered if those blurry AI-generated images can actually be saved? Prepare to be amazed. Below, we'll showcase a series of before-and-after transformations that demonstrate the power of AI sharpening techniques. See for yourself how these methods breathe new life into lackluster images, across various styles and applications.
Portrait Perfection: From Fuzzy to Focused
First up, we have a portrait that was initially plagued by a lack of clarity. The details were soft, and the overall image appeared somewhat washed out. Using Remini, an AI photo enhancer known for its portrait-specific capabilities, we were able to dramatically improve the sharpness and definition.
Processing Time: Approximately 7 seconds.
Result: Notice how the eyes become more piercing, the skin texture is refined, and the hair strands gain individual definition. The AI intelligently enhances the key features, bringing the subject to life. Check out the difference below:
[Before/After Image Slider]
Landscape Enhancement: Unveiling Nature's Detail
Landscapes often demand intricate detail to truly capture their grandeur. Our original landscape image suffered from blurriness, obscuring the textures of the foliage and the subtle nuances of the sky. To tackle this, we turned to Let's Enhance, a tool designed to upscale and enhance images while preserving natural details.
Processing Time: Approximately 12 seconds.
Result: The transformation is striking. The trees now boast individual leaves, the clouds have a more defined structure, and the overall scene appears significantly more vibrant. Observe the enhanced clarity in the slider below:
[Before/After Image Slider]
Abstract Art Clarity: Defining the Undefined
Even abstract AI-generated art can benefit from sharpening. While the goal isn't necessarily realism, enhancing the details can add depth and visual interest. In this example, we used Deep Image AI, an AI platform offering various image manipulation tools, including sharpening and detail enhancement, to refine an abstract piece.
Processing Time: Approximately 5 seconds.
Result: The sharpened image reveals finer lines, more distinct color gradients, and an overall sense of increased complexity. The AI brings out nuances that were previously lost in the blur. See the effect for yourself:
[Before/After Image Slider]
Product Photography: Sharper Sales Appeal
For e-commerce, crisp product images are crucial. This example shows how a blurry image of a product can be transformed into a sharp and appealing visual using AI. We leveraged Icons8 Smart Upscaler, an AI tool specifically designed for upscaling and sharpening images for commercial use.
Processing Time: Approximately 9 seconds.
Result: The sharpened image displays the product's texture, edges, and details with greater clarity. This level of detail can significantly improve the perceived quality and desirability of the product, leading to increased sales. Compare the difference:
[Before/After Image Slider]
Architectural Visualization: Precision and Definition
Blurry architectural renderings can obscure important design details. In this example, we used VanceAI, known for its powerful image enhancement capabilities, to sharpen an architectural visualization.
Processing Time: Approximately 15 seconds.
Result: The sharpened image reveals cleaner lines, sharper edges, and a greater sense of depth. The AI enhances the textures of the building materials, making the visualization more realistic and impactful. Check out the transformation:
[Before/After Image Slider]
Cartoon and Anime Style: Enhanced Visual Pop
Even cartoon and anime-style images can benefit from AI sharpening. The aim is to enhance the linework and color vibrancy. For this, we employed Cutout.Pro, which offers various AI-powered editing features, including image sharpening tailored for graphic styles.
Processing Time: Approximately 6 seconds.
Result: The sharpened image features bolder lines, more vibrant colors, and an overall enhanced visual pop. The AI adds a layer of polish that makes the image more engaging. See it in action below:
[Before/After Image Slider]
These examples demonstrate that AI sharpening is not just about fixing blur; it's about enhancing the overall quality and impact of your AI-generated images. The right tool can make a significant difference, bringing your creative visions to life with stunning clarity.
Now that you've seen the impressive results, let's move on to a detailed step-by-step guide on how to achieve these transformations yourself.
Troubleshooting Common Issues
Even with the best AI image upscalers, you might encounter some hiccups along the way. Let's troubleshoot some common issues.
Image Becomes Over-Sharpened
Sometimes, the quest for sharpness can go too far, leaving you with an image that looks like it's been through a cheese grater. Over-sharpening introduces harsh edges and unnatural textures, which defeats the purpose of enhancing the image in the first place. It's like adding too much salt to a dish – you lose the original flavor.
The Culprit: The intensity settings of the upscaling algorithm are too high.
The Fix:
Most AI tools offer adjustable intensity or sharpness settings. Experiment with reducing these to find a sweet spot. Think of it as fine-tuning a musical instrument; small adjustments can make a big difference.
If you're using a tool like Topaz Labs, which offers precise control, gradually decrease the sharpness or detail recovery sliders until the image looks natural.
Some tools, such as Remini, an AI photo enhancer that focuses on restoring old photos, have a one-click enhance feature. While convenient, these may sometimes overdo it. If so, look for more granular controls within the app.
Artifacts Appear
Ah, the dreaded artifacts! These unwanted distortions can manifest as strange patterns, blotches, or pixelated areas that weren't present in the original image. Artifacts are like digital gremlins that creep in and ruin the visual feast.
The Culprit: The AI model struggles with specific image types or complex details, or the upscaling process introduces errors.
The Fix:
Try a Different AI Model: AI models are trained on diverse datasets. What works wonders for a portrait might falter with a landscape. Experiment with different models within your chosen tool to see if one handles the image better. Some tools, like Nightcafe Creator, an AI art generator that offers multiple methods and community options, allow you to select from various AI models.
Reduce Upscaling Factor: If artifacts persist, try upscaling by a smaller factor (e.g., 2x instead of 4x). This reduces the strain on the AI and minimizes the chances of introducing errors.
Pre-Process the Image: Before upscaling, apply subtle noise reduction or smoothing filters using tools like Adobe Photoshop AI to clean up the original image. This gives the AI a cleaner slate to work with.
Colors Look Washed Out
Ever upscaled an image only to find the colors looking pale and lifeless? This loss of vibrancy can make the image feel dull and unappealing, like a faded photograph from yesteryear.
The Culprit: The upscaling process alters the color balance or reduces color saturation.
The Fix:
Use Creative Upscaling Mode: Some AI tools offer specialized "creative" or "artistic" upscaling modes that enhance colors and add visual flair. These modes are designed to breathe new life into images.
Adjust Saturation and Contrast: After upscaling, use a photo editing tool to manually adjust the saturation and contrast levels. A slight boost in these areas can restore the image's original vibrancy. Consider using Picsart AI, an all-in-one creative platform, to fine-tune these settings.
Color Correction: Use color correction tools to address any color casts or imbalances introduced during upscaling. A simple white balance adjustment can often make a significant difference.
Addressing these common issues ensures that your AI-generated images look their absolute best, maximizing the potential of these powerful tools and avoiding frustrating pitfalls.
FAQ Section: Your AI Image Sharpening Questions Answered
Got questions about sharpening those AI-generated images? You're not alone! Let's dive into some frequently asked questions to clear things up.
Can you fix extremely blurry AI images?
This is the million-dollar question, isn't it? The truth is, while AI image sharpening tools have come a long way, there are limits. Think of it like trying to reconstruct a puzzle with missing pieces. If an image is just slightly out of focus, tools like Photoshop AI or Pixelcut can work wonders by filling in missing details based on patterns and contextual understanding.
However, if an image is severely blurry, with very little discernible detail, even the most advanced AI might struggle. The AI needs some information to work with. In these extreme cases, the results might be underwhelming, leading to artifacts or unrealistic-looking details. It's like trying to enhance a photo that's been compressed to just a few pixels – there's simply not enough data to recover a sharp image.
That being said, new advancements in AI are constantly pushing these boundaries. So, while a completely destroyed image might be unrecoverable today, the technology could improve dramatically in the near future. Keep an eye on the AI News section for the latest developments.
Which AI upscaler works best for portraits?
Ah, portraits! Capturing the nuances of a face requires a delicate touch. When it comes to AI upscaling portraits, you'll want a tool that excels at preserving natural skin textures and facial details.
Several options stand out:
Remini: This app is a popular choice for enhancing old or blurry photos, especially portraits. It's designed to intelligently detect and enhance faces, making it a strong contender. Remini leverages AI to restore details, reduce noise, and sharpen faces, often producing impressive results with old or low-quality images.
Topaz Photo AI: Known for its sophisticated algorithms, Topaz Photo AI excels at upscaling images while minimizing artifacts. Its face recovery feature is specifically designed to enhance facial features in a natural-looking way. This tool is particularly good at preserving details while upscaling, making it suitable for professional use.
Let’s Enhance: This tool offers various AI-powered enhancements, including upscaling and sharpening, and is known for its ability to preserve details in portraits. It uses AI algorithms to enhance resolution without losing the natural look of the subject's face.
Ultimately, the best choice depends on the specific image and your desired aesthetic. Experimenting with a few different tools is always a good idea.
How long does automatic image sharpening take?
The beauty of AI-powered tools is their speed and efficiency! The time it takes to automatically sharpen an image depends on several factors:
Image Size: Larger images naturally take longer to process than smaller ones.
Tool Processing Power: Some tools use more advanced (and resource-intensive) algorithms, which can extend processing times.
Your Hardware: Your computer's processing power and internet speed (if it's a cloud-based tool) also play a role.
In general, you can expect most AI image sharpening tools to take anywhere from a few seconds to a minute or two per image. Mobile apps are often quicker for simple enhancements, while desktop software with advanced features might take a bit longer. Cloud-based services like Cutout Pro can also be fast, but depend on your internet connection.
Are free AI sharpening tools as good as paid ones?
This is where things get interesting. Free AI sharpening tools can be surprisingly effective for basic image enhancements. They often provide a quick and easy way to reduce blur and improve clarity. Tools like Fotor AI offer basic sharpening features for free.
However, paid tools generally offer more advanced features, finer control, and superior results. Here's a quick comparison:
Feature | Free AI Sharpening Tools | Paid AI Sharpening Tools |
|---|---|---|
Image Quality | Decent for basic sharpening | Superior, with fewer artifacts and better detail preservation |
Features | Limited features, basic adjustments | Advanced options like face recovery, noise reduction, and batch processing |
Control | Less control over sharpening parameters | Fine-grained control over various settings |
Output Quality | May produce noticeable artifacts or over-sharpening | Optimized for natural-looking results |
Usage | Ideal for quick fixes and casual users | Best for professional use and high-quality results |
Ultimately, the choice between free and paid tools depends on your needs and budget. If you only need occasional sharpening for personal use, a free tool might suffice. But if you require professional-grade results or advanced features, investing in a paid tool is well worth it.
Have more AI questions? Check out our Learn section for tutorials and guides on mastering AI tools.
Conclusion: Level Up Your AI Images Today!
Ready to say goodbye to blurry AI-generated images? Let's recap the best approaches for different scenarios so you can finally achieve crystal-clear visuals.
Choosing the Right Method for Your Needs
The best method truly depends on your specific use case. Here's a quick rundown:
For quick and easy fixes: If you need a fast solution without compromising too much on quality, online tools like IMGUpscaler offer a convenient way to enhance your images. These are perfect for casual use or when you're on the go.
For detailed control: If you require more control over the upscaling process and want to fine-tune the results, consider using professional photo editing software like Adobe Photoshop AI. This gives you the flexibility to adjust various parameters and achieve the desired level of sharpness and clarity.
For batch processing: If you have a large number of images to enhance, dedicated AI image upscaling tools such as Upscale Media are your best bet. They can automate the process and save you valuable time and effort.
For artistic enhancement: If you're looking to not only improve the resolution but also add artistic flair, AI art generators like Midjourney or Leonardo AI can be surprisingly effective. Midjourney is a powerful AI image generator known for its artistic and photorealistic results.
For mobile convenience: If you need to enhance images directly from your smartphone, mobile apps like YouCam App Provider offer a quick and convenient way to improve image quality on the go.
Experiment and Find Your Perfect Workflow
Don't be afraid to experiment! The world of AI image enhancement is constantly evolving, and new tools and techniques are emerging all the time. Try combining different methods to see what works best for your specific needs and artistic vision. Perhaps start with a basic upscale using an online tool, then refine the image further in photo editing software. The possibilities are endless. Remember, the goal is to find a workflow that consistently delivers the results you're looking for.
The key to mastering AI image enhancement is experimentation. Don't be afraid to try different tools and techniques until you find what works best for you.
Stay Ahead of the Curve
Want to stay updated on the latest AI image enhancement tips, tricks, and tools? Sign up for our newsletter! We'll keep you informed about new developments in the field, share exclusive tutorials, and provide insider insights to help you get the most out of your AI-generated images. From mastering prompt engineering to understanding the nuances of different AI models, we've got you covered.
Take Action: Start Enhancing Your Images Today!
The power to create stunning, high-quality AI-generated images is now at your fingertips. Don't let blurry visuals hold you back. Explore the methods and tools we've discussed, experiment with different workflows, and unleash your creative potential. Whether you're a professional designer, a hobbyist artist, or simply someone who wants to make their images look their best, now is the time to take action. Go forth and create!
And if you're looking for more amazing AI tools to add to your arsenal, be sure to check out our Top 100 AI tools list. You might just discover your new favorite resource.
Keywords: how to fix blurry AI-generated images automatically, AI image upscaling, automatic image sharpening, AI photo enhancement, deblur AI images, AI image sharpener online free, best AI image upscaler, fix blurry pictures AI, Stable Diffusion image sharpening, Topaz Sharpen AI, Real-ESRGAN, AI image enhancement mobile app, fix blurry AI art, upscale AI images without blur
Hashtags: #AIImageUpscaling #AIEnhancement #ImageDeblur #AISharpening #BlurryImageFix
For more AI insights and tool reviews, visit our website https://best-ai-tools.org, and follow us on our social media channels!
Website: https://best-ai-tools.org
X (Twitter): https://x.com/bitautor36935
Instagram: https://www.instagram.com/bestaitoolsorg
Telegram: https://t.me/BestAIToolsCommunity
Medium: https://medium.com/@bitautor.de
Spotify: https://creators.spotify.com/pod/profile/bestaitools
Facebook: https://www.facebook.com/profile.php?id=61577063078524
YouTube: https://www.youtube.com/@BitAutor
Recommended AI tools
Sora
Video Generation
Create stunning, realistic videos & audio from text, images, or video—remix and collaborate with Sora 2, OpenAI’s advanced generative app.
Adobe Photoshop
Design
Create, edit, and design with industry-leading AI-powered image innovation.
Canva Magic Studio
Design
All the AI magic of Canva, in one place.
GitHub Copilot
Code Assistance
Your AI pair programmer and autonomous coding agent
Notion AI
Productivity & Collaboration
The all-in-one AI workspace that takes notes, searches apps, and builds workflows where you work.
Wan
Video Generation
AI Video Creation. Realism. Audio. Control.
Was this article helpful?
Found outdated info or have suggestions? Let us know!
